Thursday, October 30, 2014

A Trip to the Studio


A while back I took a beginner’s pottery class.  I did a semester in pottery in high school but my area, although filled with artsy fartsy folks, doesn’t offer “real” pottery classes.  Not often anyway.  That said, the reason I told you about the class is because the instructor found out that I was a scrap booker, sometimes card maker, painter and paper crafter and I referenced my spare room as a “craft room”.  He told me that it was my studio.  Any artist’s room where they create is a studio. 

I have a hard time calling it that.  It’s just a room in my house and I’m an amateur at best.  I don’t ever see myself painting anything as beautiful as Monet did, where people just want to gaze upon my work.  Sometimes though, I like the idea of it and I may make a sign that says just that.  STUDIO.  Big caps that will force me to open my eyes and realize I can create – anything.

So, the other night I went upstairs to the studio and took out the kid’s school days books to add their school photos we received last week.  While doing that I found last year’s photos too, so I made pages for those too.  I took a photo of Hannah’s because I thought hers came out really well. 


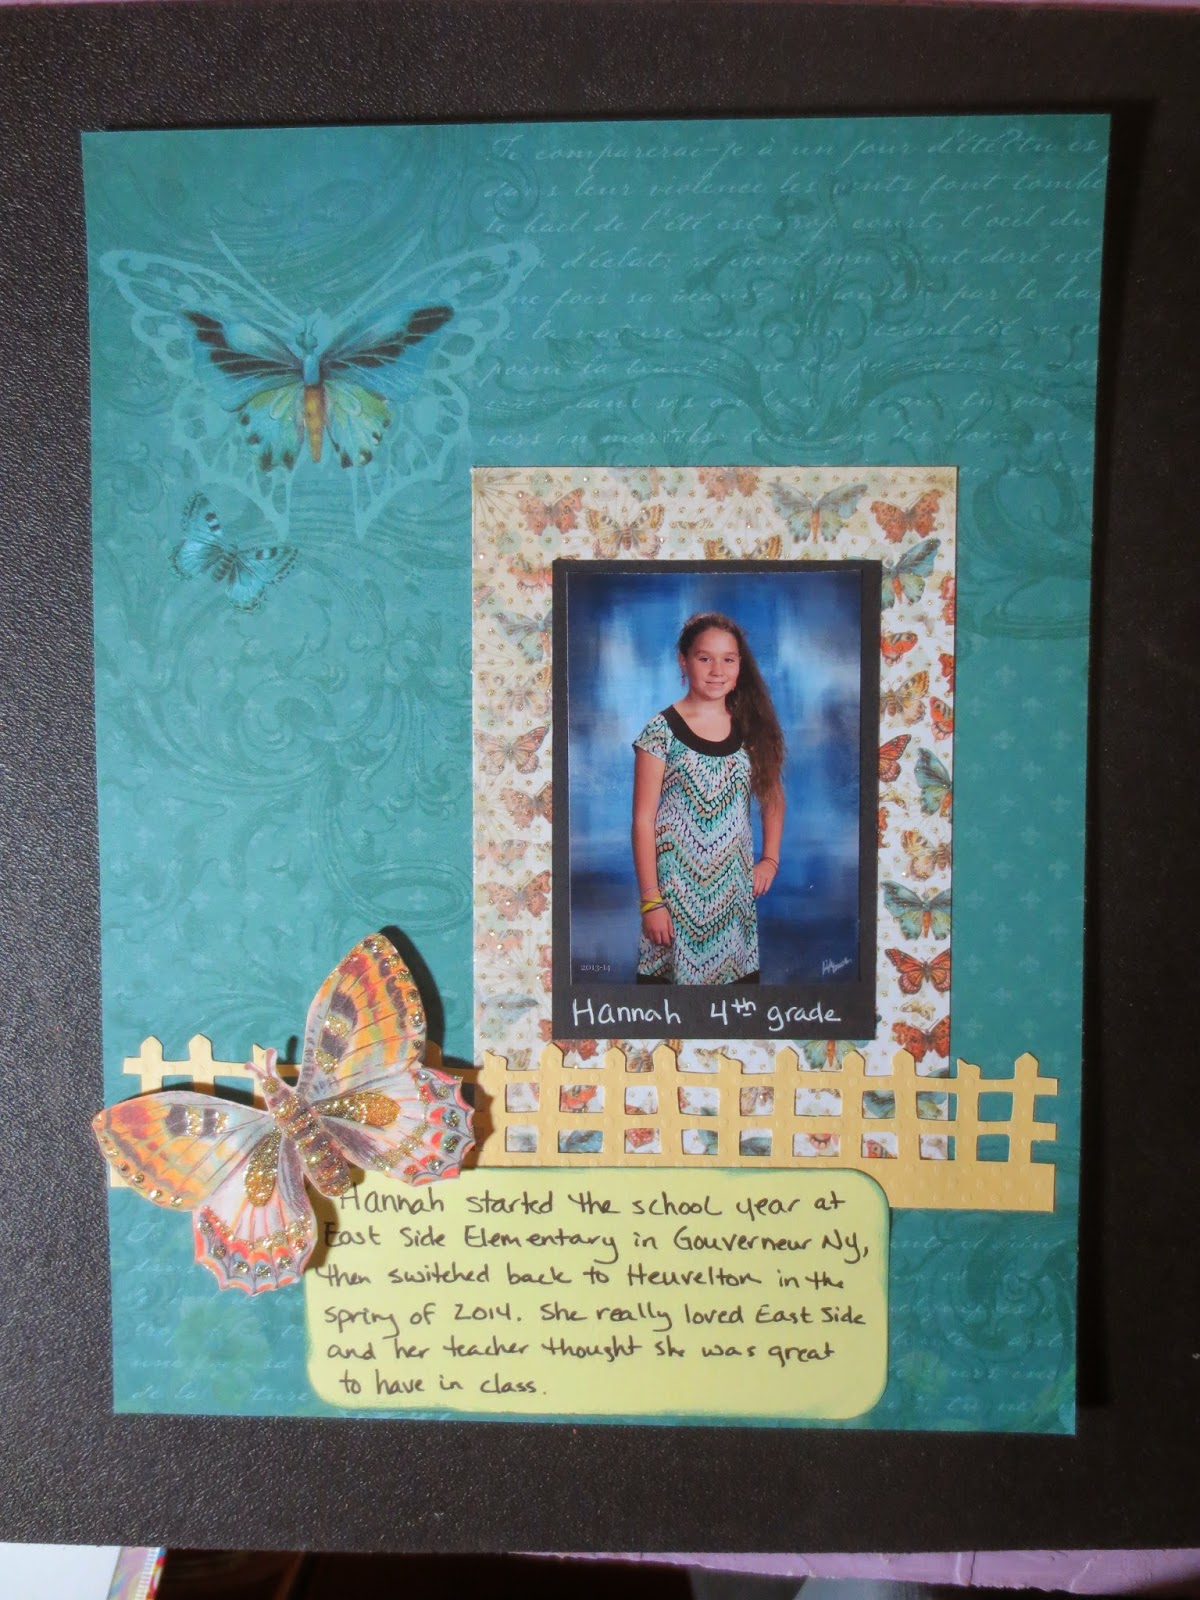
I used the Mariposa stack from DCWV and did a little layering.  I used my border punch from Creative Memories and added a picket fence.  I like the idea of her still being behind a fence, being protected just a little bit longer.  The world is going to invite her out to play soon, and then there’s no going back.  <sigh>  It’s already happening.  This was last year’s pic.  I cut a butterfly from one of the accent pages in the stack and layered that on with a couple of those thick stacker squares.  She just looks like she needed that on her page.

I was really happy how this turned out.  It’s an 8-1/2” x 11” layout which I don’t use very often.  I’m considering a title for the page but I wanted to get it in the album so she could see it.  It’ll get done soon enough.  I’m just glad I did it.


Friday, October 24, 2014

Toilet Paper Roll Album


             Last year at a scrapbook event I met a woman who was carrying toilet paper rolls in her stash of paper.  She talked of a toilet paper roll album that she had started making and had even been handing out as gifts.  I was intrigued, but did nothing.  I kept thinking about it, but since we use the roll-less TP, I was pretty much up the creek in the supplies department.

Fast forward to September 2014 – the local supply store has stopped carrying the roll-less TP and we have to buy the regular kind.  Finally, I can begin!  I knew immediately what paper I was going to use.  I had the Tim Holtz Lost and Found stack and had been dying to use it.  Then I started cruising YouTube to find a tutorial, and boy did I find one!  Check out My Sisters Scrapper – she has a ton of great tutorials and the ones I watched are really easy to follow! 

http://youtu.be/-8vndiRxuWk?list=UUuSLCMH4NBu0wUKEzD6Jw3w

She lists all the supplies you’ll need, plus dimensions, and it was like taking a class in my craft room. 


I didn’t do any embellishing – it’s not my strong point, plus I’m afraid to store anything that has stuff all over it.  There should be a class out there – “Don’t Fear the Embellie!”  Also, I will try to find better magnets.  The ones I picked up don’t seem strong enough when placed under paper.  I might need to use thinner paper though instead of cardstock. 


I love the product I ended up with.  Several of my friends have said it looks like something one would find in a gift shop.  I know I’m going to make several more and pass them on as gifts this Christmas.  I just feel really good about how well it turned out and wanted to share.


Tools I used:
Fiskars trimmer
Creative Memories trimmer
Fiskars tag punch
Creative Memories round tag


Monday, October 20, 2014

School Days Album

This is a project that I contemplated for a long while and then finally jumped in with both feet at an all-day crop.  Sometimes all day crops are hard to pack for, because if you’re like me you have a ton of projects and they are scattered and tucked in all over your work space.  If you are totally organized then I want to be your best friend and you can make my space useable!!!

This project that I had been delaying was a school days book for each of my grandkids.  I had cleaned out binders at work, and instead of throwing them away I was told I could take as many as I wanted.  Woohoo!  Three-ring binders for free!  Granted, they weren’t in the best condition, but they were usable and had potential.  I began dreaming right away of what I would use them for and how and that’s when I came up with the school days idea. 

I had a school days book when I was a kid, that my mom filled out and then as I got older I took over.  It had my school photos, friends, clubs, report cards, and I’m so glad that my parents thought it was important.  I look at it now and I see the year I cut my own hair because I wanted bangs.  And there’s the year I tried to do a glamour pose on picture day.  That’s the year I joined FFA and art club.  <sigh> Memories.  They are right there in that book in their most basic form and then my brain kicks into recall and it’s like going back.  Well, I want that same feeling for the kids.  I was lucky because I went to the same school my whole life.  The grands move around – a lot.  I thought this might give them a semi-permanent place to land once in a while.

I started with a binder that I cleaned off fairly well.  They had been on the shelf for quite some time and were a bit dusty.  The kids had picked out their duct tape and I had some old DCWV paper on hand.  Now these are not state of the art albums, but they were crafted with love.  I glued the paper onto the binder with my Aileen’s Tacky Glue.  Then I used the duct tape to secure the edges so they don’t rip or fray.  I also used it for the spine of the book.  The kids really liked that.  They liked it better than the paper so next time we may just go with straight tape.  However, my vision was with paper so that is where I went.

I also used coordinating paper for the pages, some of which I slipped into protective page coverings.  I also made pockets out of used manila envelopes.  My whole idea was to recycle/re-use as much office supplies as I possibly could.  I know it’ll barely make a dent in a landfill, but I needed to try.  I will eventually add photos from scouts and 4H and different things they did with their friends, but at least this part is done and ready to go.  The kids were surprised and they thought it was pretty cool that I did it for them.  I hope they really appreciate it when they are older and can look back and say, “That’s the year I almost won the rain gutter regatta”, or “That’s the year I let my bangs grow out”.


I just hope it makes them smile.

Thursday, October 16, 2014

Fiskateers WCMD Challenge


As you may know, several weeks ago we crafters celebrated World Card Making Day.  Some of us celebrated by drinking our coffee and moving on with the day.  Others thought about crafting but went shopping instead and bought new supplies.  Others trolled Facebook and were rewarded by the Fiskateers wanting to do several challenges for the day.

The first challenge was to do a Halloween card.  As it was the beginning of October I thought this was a great idea!  Plus, I have never made a Halloween card.  I actually don’t make a lot of cards and those I do make, well, I’m a little embarrassed to send.  But this challenge pulled together a lot of colors that I like – mainly orange (the official Fiskars color), and anything bright or dark or spooky!  I love anything on black so I made this cute little card.  I used the Fiskars gingerbread man punch for the ghosts and just cut off one of the legs.


The second challenge was to create a card with a flower embellishment on it.  I used my border punch system by Creative Memories, using the notebook cartridge with some pretty patterned pink cardstock.  Once punched, I scored it using my Martha Stewart scoring board and hot glued the sucker together into a rosette.  This was after several tries of creating a ripped piece of cardstock twisted into a beautiful rose, and crumpled circles of paper manipulated to look like morning glories.  Didn’t work.  So I made the rosette.  I like it!  I ripped apart a tiny silk flower and popped an enamel dot on top and I think it looks cute!


The last card of the challenge was a thank you card.  At this point I didn’t know what I was going to do.  You can tell, because this card is by far the least worked upon.  To be truthful, I did the Halloween card the first day and then the other two I had worked in a couple of days after.  It was an extremely tough weekend and I had a hard time getting to my room to work.  You know how it is!  As I was part of the initial cheer heard on the Fiskateer FB page regarding these challenges, I persevered.  I wanted something a little more formal and I pulled out this paper pad I had purchased previously.  Now smile – that sounded cool!  I love the blues and browns in this pack and I especially loved the blue patterned paper that I grabbed.  The paper is by Colorbok, by the way.  I used my cricut to cut out “merci” and then I placed everything together with some ribbon to embellish, colored my merci with glitter glue, and voila!  The card is finished!  I ended up having to tack town the ribbon with hot glue, smudged my lettering and had to re-do the glitter as best as I could.  I don’t think it’s too bad…


After the weekend was over I was contacted by Fiskateers to let me know that my Halloween card was chosen (at random) as a winner!  There were so many other cards that were great, but this little card I do love!  I have no idea who I am going to send it to though!  I received my prize yesterday, after a fifteen hour day of work, appointments and meetings.  I have yet to play with it but I am thoroughly excited to get my hands on it and go.


Thank you Fiskateers!  It was truly a wonderful experience getting together with other Fiskateers for a day to challenge ourselves and encourage each other in our crafting and especially card making.  It’s been a long time since we’ve done this and I’m really glad I got to be a part of it.  It also made me want to kick-start this blog, so thank you!